If you would like your very own e-commerce store, then you’ve come to the right place. In this guide, we will be explaining how to build an online store with WordPress.
Although there are plenty of e-commerce store builder solutions out there, as you’ll soon see, there are many great reasons to choose WordPress as the platform for your online shop.
In this e-commerce guide we’ll take a look at why WordPress is a safe choice for your business, how you can go about turning this popular blog and website publishing tool into an e-commerce platform, before finishing off with some advice on how you can upgrade your store and give it a professional look that will impress your potential customers.
Why Use WordPress for Your Online Store?
If you’re an experienced WordPress user then you will need no convincing as to why WordPress is the perfect platform for your online store.
However, if you are new to WordPress, you might be wondering why you should trust this free blogging software to power your online store.
One of the advantages of using WordPress over a hosted service like Shopify is that you will own your store and all of your data, rather than having to pay a monthly fee to the provider to keep your account alive.
Sure, with a WordPress website, you’ll still need a web hosting account. However, you’ll be free to move hosts should the need arise, while also having full control over your website, ranging from how it looks to the underlying code.
Another great reason to choose WordPress is the large ecosystem that has built up around it over the years. This includes countless online resources for getting advice and support, plenty of third party upgrades and add-ons to improve your website, and a whole community of developers and coders who are experienced at supporting and working with WordPress.
All this makes WordPress not only a great choice for building almost any type of blog or website but also e-commerce stores.
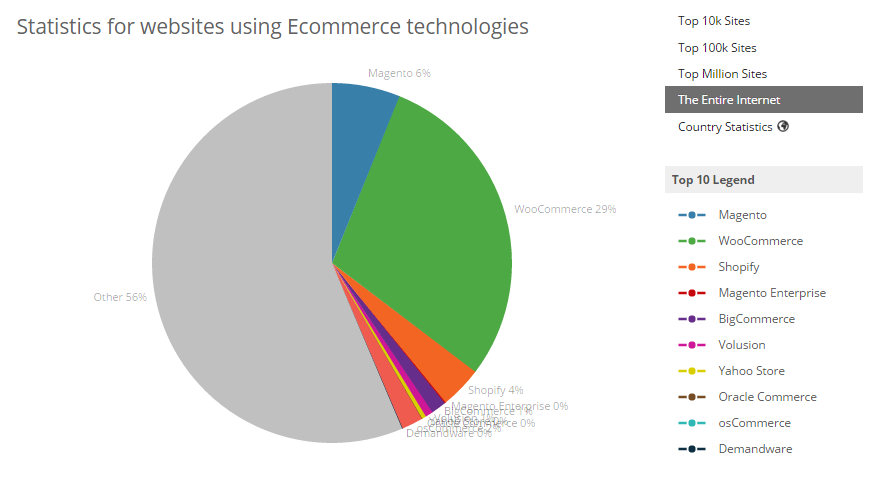
Don’t just take our word for it, though, WordPress (and WooCommerce, which we’ll get to shortly) is one of the most popular e-commerce platforms in use today, according to Builtwith.com.
So now that you know why you should be using WordPress, let’s take a look at how you can use WordPress to build an online store.
Choosing the Right E-Commerce Plugin

In order to add the essential online store features and functionality to your WordPress website – that will turn it into a fully functioning e-commerce website – you’ll need to install a plugin.
These plugins upgrade the capabilities of WordPress, allowing it to do much more than simply publish posts and pages online. However, when it comes to creating an online store, there are many e-commerce options to choose from.
The most popular e-commerce plugin for WordPress is WooCommerce and there are many reasons for this. Not only is the core version of WooCommerce free to use, but it’s also very easy to get to grips with. This e-commerce plugin contains all the core features you’ll need to start listing products on your website, making them available for purchase, managing your stock, and collecting payments from your customers.
The core WooCommerce plugin offers enough functionality to get started or to manage a basic online shop. However, as your store takes off, or if you have more advanced requirements from the outset, you can choose from the large library of WooCommerce extensions.
These WooCommerce extensions add more features to your website, covering everything from additional payment methods and advanced shipping options, through to social media promotion and customer loyalty programs. It’s safe to say, that no matter what feature or functionality you want to add to your store, there’s probably already a corresponding WooCommerce add-on available.
Although WooCommerce is a highly versatile e-commerce toolkit, if you are planning to only sell digital files or downloads from your website, then the Easy Digital Downloads plugin for WordPress might be a better choice.
WooCommerce can be used to sell digital downloads, but if that is all you will be selling, Easy Digital Downloads is well worth a closer look as an alternative plugin.
How to Create Your E-Commerce Store with WordPress
So know that we know why WordPress is a great choice for your e-commerce website and WooCommerce is the right tool for turning it into an online shop, let’s get started and begin building our website.
If you are yet to setup your first WordPress website, this beginner’s guide on how to make a WordPress website will get you up to speed.
Installing the WooCommerce Plugin
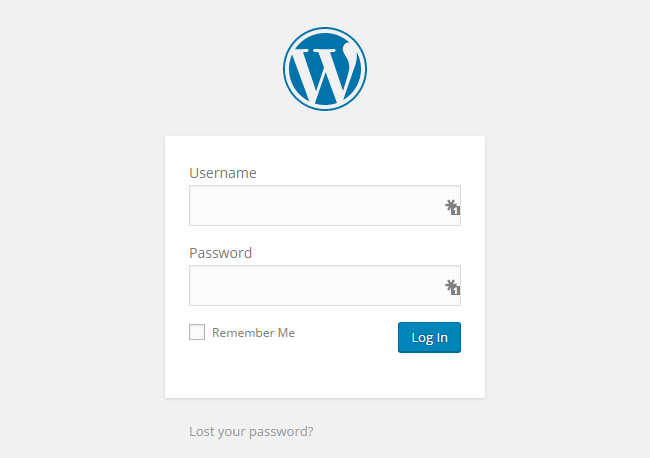
Once your WordPress website is online, the first step is to install a suitable e-commerce plugin. As discussed earlier, the WooCommerce plugin is a great choice. To install this plugin, log into the admin dashboard area of your WordPress website.

Once you’ve logged in, locate the Add New item on the Plugins menu.

Now enter WooCommerce in the search box and press your enter key.

WooCommerce should be the first plugin listed, so click on the Install Now button to start adding it to your website.
After clicking on the Activate Plugin link, you can start setting up the e-commerce area of your WordPress website.
How to Setup Your WordPress E-Commerce Store
One of the great reasons to choose WooCommerce is that it includes a handy quick setup wizard that will walk you through the process of configuring your online shop.

As you walk through the setup, the plugin will create the pages your store will need. This includes the shop page that will display your products, the shopping cart area, the checkout page, and the customer account area.
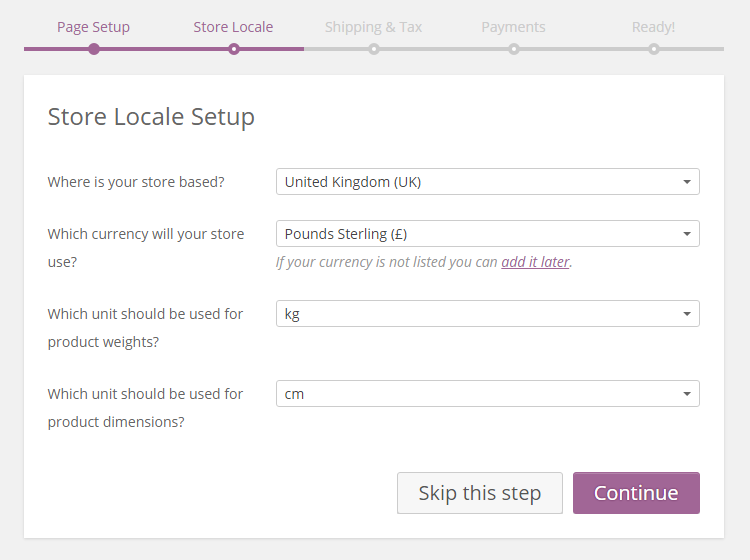
From the next step, you can enter where your store is based, which currency your store will use, and other locale-related settings.
Shipping and Tax Details
If you will be shipping physical goods to your customers, rather than simply trading in digital downloads, you can enter the basic shipping costs in the next step.

On the same screen, you can also enter the basic tax details for your products and store. All of this can be changed through your store dashboard later.

Payment Options
To help you get started, the core WooCommerce plugin allows you to accept payments from your customers through the PayPal Standard service. This well-known and trusted payment processor will allow your customers to pay through the PayPal website before the money is deposited into your PayPal account.
It’s free to start using the PayPal Standard service, with a small percentage taken from each transaction as a fee. This means that instead of paying a monthly fee for your own payment processor service, you can start collecting payments from your customers and only paying for the privilege each time you make a sale.
You can upgrade the payment collection process of your store at any point, by installing one of the payment gateway extensions for WooCommerce. This includes adding support for more payment processors and adding the ability to collect payments directly on your store, without the customer having to pay through the PayPal website.
With the core WooCommerce plugin, you can also enable offline payments, such as bank transfers, cash on delivery, or cheque payments.
Creating Your First E-Commerce Product
After completing the quick start guide, it’s time to create your first product. This takes place through a modified version of the WordPress post editor, giving you the opportunity to describe, explain, and promote your product.

WooCommerce will display some handy tooltips that will help you to know what to do and which steps you should complete in order to publish your product listing.
The main components of your product listing will include:
- Product Title
- Product Description
- Short Product Description
- Product Categories
- Product Tags
- Product Image
- Product Gallery
The product categories and tags will help your visitors to navigate their way around your store and find more of the products they are interested in. Each product can have one main image, as well as a gallery of supporting images. Images can play a large part in determining how well your products sell, so be sure to make the most of this feature.
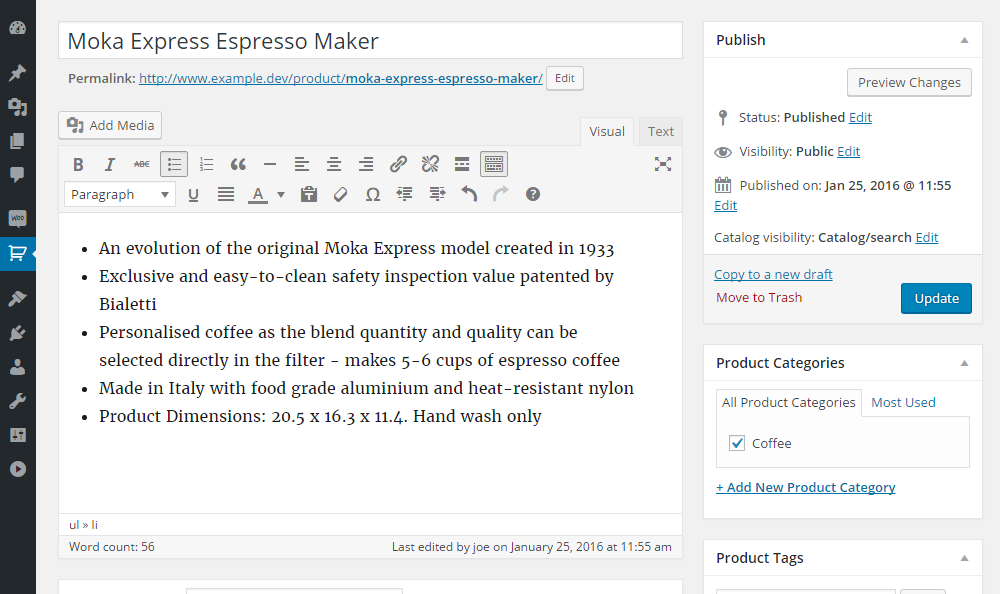
As you enter the information, you can preview your product at any time to see how it will look to your visitors.
Once you’ve entered the main product information, it’s time to move on to the Product Data panel.
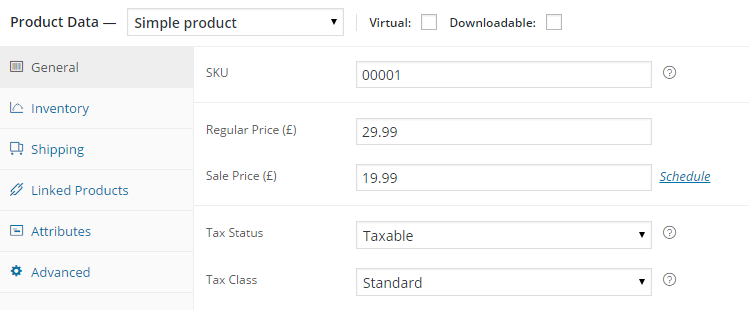
From the general section, you can enter the pricing information and add a product SKU – a unique reference that identifies the product.
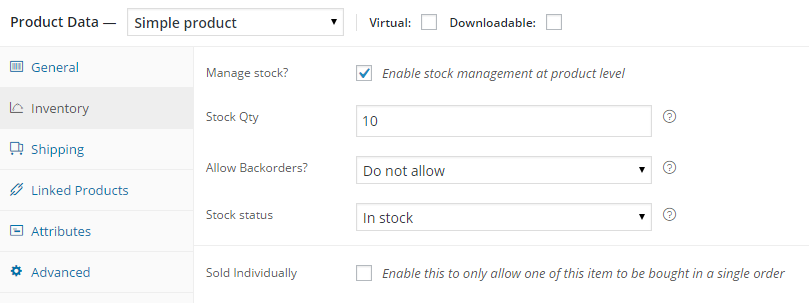
The other sections on the product data panel let you set the inventory levels for the product, enter the shipping details, add linked products, enter a purchase note, and more. Once you’ve entered all of the necessary details, you can publish the product to set it live and make it visible to potential customers.

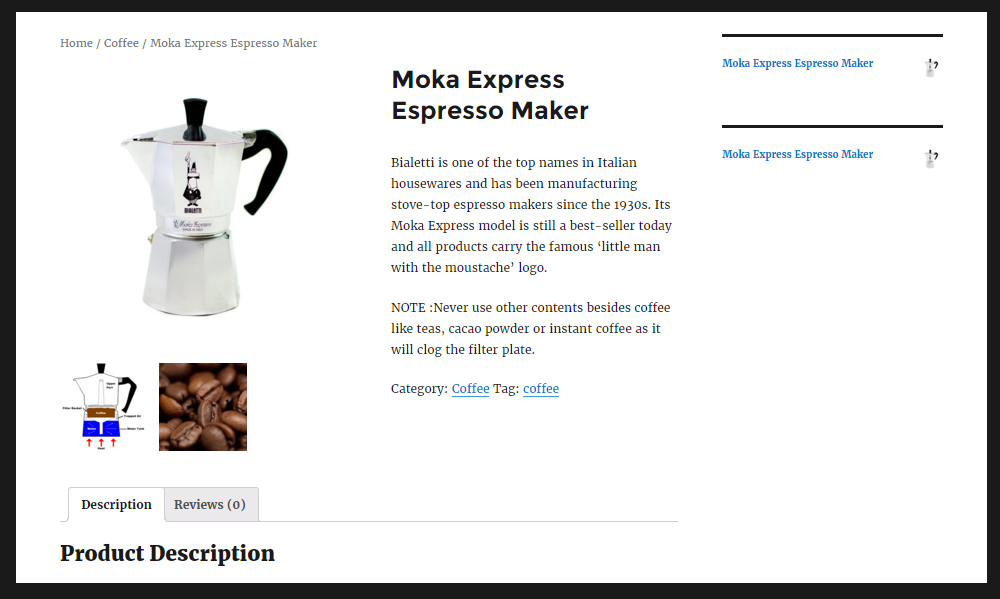
If you’ve added the pricing information and the inventory levels, you should see the price displayed on the product listing, as well as the Add to Cart button.
Your product listing may look different to the above example, depending on which WordPress theme you’ve chosen for your site – more on this later.
Displaying the WooCommerce Widgets on Your Store
Now that you’ve created a product, you may want to add some of the WooCommerce widgets to the sidebar areas of your website. This will make it easier for visitors to your site to find your products, as well as the other important e-commerce pages of your store.
These widgets will display some of the products from your store; recently viewed items; links to the customer’s shopping cart; and a few other items. These links and items will be displayed in the sidebar or other widgetized areas of your website.
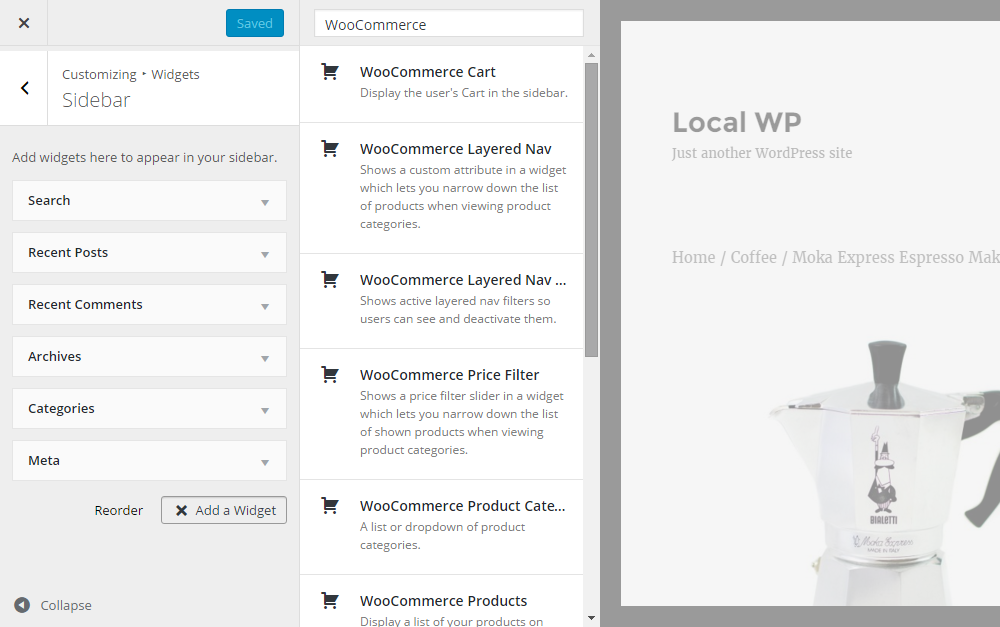
The Customizer tool lets you set up the widgets on your site and by filtering the available options, you should be able to find all of the WooCommerce widgets.
Upgrading Your Online Shop with a Premium E-Commerce Theme
As mentioned, how your website looks, including its e-commerce elements, such as the product and shopping cart pages, will be defined by which WordPress theme you are using.
Most modern WordPress themes should include some support for popular e-commerce plugins, such as WooCommerce. However, if you really want to make the most of your store, the best option is often to choose a theme that has been built specifically to work with WooCommerce.
Doing so ensures that your theme of choice will include attractive product templates, well-designed shopping cart and checkout pages, and a professional looking customer dashboard area. You might also find other e-commerce related elements, such as additional widgets, more page templates, and other tools to enhance your store.
Popular E-Commerce WordPress Themes
If you want to give your e-commerce store a quick upgrade and a more professional look, choosing the right theme is a great way to achieve this. To help you find the right theme, here are some popular options with full e-commerce support.
North
North is an e-commerce theme that makes it easy to setup a professional online store. As well as being able to import the demo content to quickly setup your store, you can use the customization tool to give your site a more personalized look and feel.
To help your potential customers find exactly what they are looking for, North includes some handy product filter tools and navigational aids.
You can try the North demo here
UberStore
UberStore is a highly customizable, professional shopping theme. It includes full WooCommerce support, as well as lots of features to help present your products in the best way and encourage your visitors to become customers.
You can try the UberStore theme here
Bronx
The Bronx theme has been built especially for creating e-commerce stores with WordPress and WooCommerce. This theme is fully responsive to support your mobile users, as well as including all the templates you need to make your online shop a success.
You can try the Bronx demo here
If you are looking for more inspiration for your store, you can also find a collection of the best WooCommerce themes here.
WordPress E-Commerce Final Thoughts
I hope that you now have all the information you need to setup an online store with WordPress. With PayPal taking care of processing payments, much of the responsibilities of storing customer data are taken off your hands.
By choosing WordPress, along with the right e-commerce plugin and a suitable theme, you can have a store online that is ready to promote your products and collect payments from your customers in no time at all.
If you have any questions about creating an online store with WordPress, please leave a comment below.

